homemade peanut butter cups

IMG_1497

A couple weekends ago, my amazing mom surprised me with the cutest little gift from Le Creuset.  It was these mini heart-shaped silicone baking cups.  I knew I had to use them immediately, and for some reason, I instantly thought of using them to make peanut butter cups.  I thought the size would be perfect, not to mention I knew the silicone material would lend perfectly to removing them from the cups once they were completed and ready to be eaten.  Plus, I’ve always loved the store-bought peanut butter cups, but I couldn’t help but think that I could recreate them on my own, and with a lot less (bad) ingredients than what the store-bought kind has.

So this weekend, I played around with a few different ingredients and in no time, I ended up with the perfect peanut butter cups.  In a few simple steps and with a little patience, I had a giant batch of these ready to be eaten.  Complete with a smooth creamy peanut butter center that melts in your mouth.  Coated in a hard milk chocolate outer shell that sweetens it all up.  And so itty bitty that there’s zero shame in popping these like they’re M&Ms.   I couldn’t help and sneak one as dessert after every. single. meal.

Peanut Butter Cups
(Makes 24 candy cups)

2 cups milk chocolate chips
1 1/3 cup confectioners sugar
1 cup creamy peanut butter, at room temperature
2 tbsp unsalted butter, at room temperature

In a double boiler (my personal preference), or in the microwave in 30-second increments, melt the chocolate.  Using a small pastry brush, brush a thin even coating on the inside of each candy cup, being sure not to leave any paper exposed on the inside.  Freeze for 10 minutes.

While the cups are in the freezer, prepare the filling; in the bowl of a stand mixer, mix the confectioners sugar, peanut butter, and butter until smooth, about 2-3 minutes.  Transfer the mixture to a piping bag with a large opening (about 1/2″ diameter).  Pipe the mixture into the frozen cups to about 1/8″ from the top.  Smooth with an icing spatula.

Transfer the remaining melted chocolate to another piping bag with a small opening (about 1/4″ diameter).  Pipe the chocolate onto the tops of the cups to the rim.  Smooth with another icing spatula and return to the freezer for another 10 minutes.

Once completely frozen, remove the paper cups from each peanut butter cup.  The colder the cups are, the easier (and less messy!) it will be to remove the paper.  Serve immediately or store in the refrigerator.

– chocolate on,
Sharon

IMG_1503

st. patrick’s day: Guinness and Bailey’s chocolate cupcakes

IMG_0667

I’m not Irish, and I’m not a huge fan of Guinness beer, but when I woke up this morning and saw that it was st. patrick’s day, I knew that it was time to put together these boozy cupcakes.  As you’ve seen in the past with my boozy bailey’s milkshakes, I am a lover of anything bailey’s.  So I did not hold back with this recipe.  Because the only thing better than homemade ganache, is homemade ganache with bailey’s mixed in.

All things aside, I made this recipe because I love chocolate, I love bailey’s, and I love an excuse to make a cupcake for friends and family.  So to all those celebrating the holiday and having an extra drink (or two!), I hope you enjoy the day and don’t be afraid to give this recipe a try!

Guinness and Bailey’s Chocolate Cupcakes
(Makes 12 cupcakes)


For the Guinness chocolate cupcakes:

1/2 cup Guinness beer
1/2 cup (1 stick) unsalted butter
3/8 cup cocoa powder
1 cup flour
1 tsp baking soda
1/4 tsp salt
1 egg
1 cup sugar
1/3 cup sour cream

For the Bailey’s chocolate ganache:

1/2 cup heavy cream
1 cup (about 6 oz) milk chocolate chips
2 tsp Bailey’s Irish Cream

For the Bailey’s buttercream frosting:

1/4 cup (1/2 stick) unsalted butter, at room temperature
2 cups confectioners sugar
2 tbsp Bailey’s Irish Cream

Preheat oven to 350F.  Line your cupcake pan with liners.

Prepare the batter; in a medium saucepan over medium heat, combine the beer and butter.  Stir in the cocoa powder and mix until smooth.  Remove from heat and set aside to cool.  In a large bowl, combine the flour, baking soda, and salt.  In the bowl of a stand mixer, beat the egg, sugar, and sour cream.  Add the beer mixture to the wet ingredients and mix.  Slowly mix in the dry ingredients until incorporated.

Next, prepare the ganache;  in a small saucepan on medium heat, bring the heavy cream to a simmer.  Pour the hot cream over a medium bowl containing the chocolate.  Whisk together for 2-3 minutes, or until the chocolate is completely melted and incorporated with the cream.  Add the Bailey’s and mix until uniform again.

Fill each cupcake liner about 2/3 full and bake for 15 minutes, or until a toothpick inserted in the center comes out clean.  Cool slightly and using a cupcake corer or teaspoon, remove a small amount of cake from the center of each cupcake.  Fill each hole with ganache to the rim, about 2 tsp worth.

While the cupcakes are in the oven, prepare the frosting; in the bowl of a stand mixer, mix the butter until smooth and creamy.  Slowly add the confectioners sugar and mix until incorporated.  Add the Bailey’s and mix until smooth.  If consistency appears to be too thick, add more Bailey’s 1 tsp at a time.  If consistency appears to be too thin, add more confectioners sugar.  Frost the cupcakes however you’d like, and drizzle with any remaining chocolate ganache!

cupcake on,
Sharon

IMG_0674

back to basics: strawberry sauce

img_1302

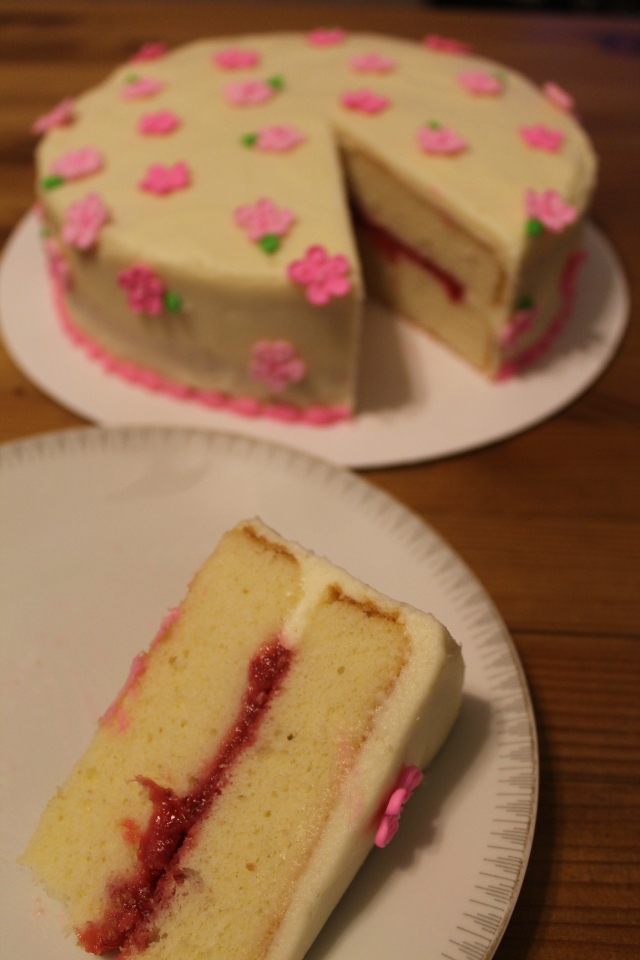
I know it’s not strawberry season, but for some reason when I walked through Whole Foods this weekend and saw the cartons of strawberries, I couldn’t help but grab one right away.  It’s probably the fact that the weather has been so spectacular lately.  Today is March 1st, a time of the year when it is often still frigid and snowing, yet for the past couple weeks, the northeast has been blessed with beautiful sunny days in the 50s and up.  I even turned my A/C on in the car this weekend!  And walked outside with a long sleeve shirt on!  So when I saw those bright red strawberries, I immediately started thinking about what I could do with them.  I knew that I had to bake a cake during the weekend, so a lightbulb went off instantly – I would make a vanilla cake with cream cheese frosting and fresh strawberry filling.

I love being able to make a basic sauce like this strawberry sauce because the possibilities with it are endless.  And we all know how much I love a versatile ingredient.  Sure, I used this sauce as a cake filling.  But this sauce also works great as a filling in a cupcake, as a sauce to incorporate into (or top) your vanilla ice cream, or even as a filling in doughnuts!  Mmmmmm.  Now excuse me while I go wipe the drool off my face!

Give this recipe a try and let me know what you use it for in the comments below.

img_1306

Strawberry Sauce
(Makes 2 cups)

2 1/2 cups cubed fresh strawberries
1/2 cup sugar
2 tbsp cornstarch

In a small saucepan, combine the strawberries and sugar and bring to a boil over medium heat, stirring constantly.  Add the cornstarch and continue to stir.  Let boil for 2 minutes and remove from heat.  The sauce will thicken and go from translucent to opaque.  Allow to cool completely before using.

– sauce on,
Sharon

img_1324


girl scout cookies as a cupcake: tagalongs

img_1286

I saved the best for last in my girl scout cookie roundup – tagalongs.  Tagalongs are crispy vanilla cookies topped with peanut butter and coated in chocolate.  I was actually really excited about making these cupcakes.  I’ve always been a fan of chocolate and peanut butter together, plus I’ve been dying to perfect my peanut butter frosting.  This was just the nudge I needed to get started.  Plus, it was the perfect break from work that I needed.  Oooops.  Don’t tell my boss.

I went with a plain jane vanilla cupcake – my go-to recipe, then topped it with some peanut butter frosting (a new favorite for sure!), and coated that with a hard chocolate shell (super easy recipe below!).  I contemplated stuffing the cupcakes with peanut butter, but I thought that might be too heavy.  So I left it out.  But feel free to experiment with that, especially if you’re crazy about peanut butter.

Peanut Butter Cupcakes
(Makes 12 cupcakes)

For the vanilla cupcakes:

1/2 cup (1 stick) unsalted butter, at room temperature
1 cup sugar
2 eggs
1 tbsp vanilla extract
1 1/2 cups flour
1 tsp baking powder
1/3 cup milk

For the peanut butter frosting:

1 cup (2 sticks) unsalted butter, at room temperature
1 1/3 cup creamy peanut butter, at room temperature
3 cups confectioners sugar
2 tsp vanilla extract

For the hard chocolate topping:

1 cup milk chocolate chips
2 tbsp coconut oil

Preheat oven to 350F.  Line your cupcake pan with liners.

In the bowl of a stand mixer, mix the butter and sugar until light and fluffy, about 2-3 minutes.  Add the eggs and vanilla extract and mix until uniform.

In another large bowl, combine the flour and baking powder.  Add half of the dry ingredients to the wet ingredients and mix.  Add all the milk and mix.  Finally, add the remaining dry ingredients and mix.  Scrape down the sides of the bowl and mix, ensuring everything is incorporated.

Fill each cupcake liner about 2/3 full and bake for 20 minutes, or until a toothpick in the center comes out clean.  Cool completely before frosting.

While the cupcakes are in the oven, prepare the frosting;  in the bowl of a stand mixer, beat the butter and peanut butter until smooth and creamy.  Gradually add the confectioners sugar 1 cup at a time until desired consistency is reached.  Add the vanilla extract and mix.  If too thin, add more confectioners sugar.  If too thick, add milk 1 tsp at a time.  Frost the cupcakes however you’d like and stick them in the freezer for 5-10 minutes.

In a medium-sized bowl, add the chocolate chips and coconut oil.  In a double boiler or in the microwave, melt everything until incorporated.  If microwave, be sure to microwave 30 seconds at a time, mixing well after each time.  This prevents the chocolate from burning and seizing up.  It typically takes no longer than 90 seconds for everything to fully melt.  Dip the tops of each cupcake in the chocolate, or just pour the chocolate over the tops.  It should harden very quickly and will turn from shiny to matte.

Well, that’s it!  I hope you enjoyed my girl scout cupcakes!  Here is the full list of my creations:
girl scout cookies as a cupcake: samoas
girl scout cookies as a cupcake: thin mints
girl scout cookies as a cupcake: s’mores

cupcake on,
Sharon

img_1283

girl scout cookies as a cupcake: samoas

img_1269

Next up on my girl scout cookie series is samoas!  I’ll be honest, I’m not the biggest fan of coconut, so this cupcake was 100% for K.  He’s a big fan of coconut, and was very excited when I came home from Whole Foods and told him there was shredded coconut in the pantry and coconut milk in the fridge.  Unfortunately for him, those ingredients are rarely found in our house!

If you are not familiar with samoas (or caramel deLites, as they’re called in some areas), they are vanilla cookies topped with caramel, toasted coconut, and chocolate.  In cookie form, all the flavors come together beautifully, so I knew this would taste just as nice in cupcake form.  These cupcakes have a vanilla cake, coconut frosting, a toasted coconut topping, plus a drizzling of caramel and chocolate sauce.  The coconut frosting was a huge hit – I literally had to fight K for the bowl of frosting when I was trying to fill my piping bag with it!

Coconut Cupcakes with Caramel & Chocolate Drizzle
(Makes 12 cupcakes)

For the vanilla cupcakes:

1/2 cup (1 stick) unsalted butter, at room temperature
1 cup sugar
2 eggs
1 tbsp vanilla extract
1 1/2 cups flour
1 tsp baking powder
1/3 cup milk

For the coconut frosting:

1 cup (2 sticks) unsalted butter, at room temperature
3 cups confectioners sugar
1 tsp vanilla extract
1/2 tsp coconut extract
1 tsp vanilla coconut milk
1/2 cup shredded unsweetened coconut

For the toppings:

1/2 cup shredded unsweetened coconut
1/4 cup (1.5 oz) milk chocolate chips, melted
1/4 cup caramel sauce

Preheat oven to 350F.  Line your cupcake pan with liners.

In the bowl of a stand mixer, mix the butter and sugar until light and fluffy, about 2-3 minutes.  Add the eggs and vanilla extract and stir until uniform.

In another large bowl, combine the flour and baking powder.  Add half of the dry ingredients to the wet ingredients and mix.  Add all the milk and mix.  Finally, add the remaining dry ingredients and mix.  Scrape down the sides of the bowl and mix, ensuring everything is incorporated.

Fill each cupcake liner about 2/3 full and bake for 20 minutes, or until a toothpick in the center comes out clean.  Cool completely and reduce oven temp to 325F (you will need the oven to toast the coconut).

While the cupcakes are in the oven, prepare the frosting;  in the bowl of a stand mixer, mix the butter until smooth and creamy.  Add 1 cup of confectioners sugar and mix until incorporated.  Add the vanilla extract, coconut extract, and coconut milk, and mix.  Add the remaining 1-2 cups of confectioners sugar until your desired consistency is reached.  If too thin, add more confectioners sugar.  If too thick, add coconut milk 1 tsp at a time.  With a spatula, fold in the shredded coconut.  Frost the cupcakes however you’d like.

With the remaining 1/2 cup shredded coconut, spread the coconut on a lined baking sheet.  Bake for 5 minutes, or until the coconut is a golden brown.  Dip each frosted cupcake in the toasted coconut, and drizzle with the melted chocolate and caramel.

cupcake on,
Sharon

img_1273

girl scout cookies as a cupcake: thin mints

img_1216

Growing up, my favorite girl scout cookie flavor was always “animal treasures”.  You know, the shortbread cookies dipped in chocolate with an assortment of animals embossed on the top.  They were sweet and chocolatey and fun!  It’s now been several years since they’ve been sold (RIP, lil’ guys) and I still find myself anxiously wondering each season if they’ll magically pop back into the lineup.  Luckily, the new s’mores cookies  are becoming my new favorite.

Despite my love for animal treasures and s’mores, it’s clear that thin mints are the clear favorite worldwide.  It seems that every year, they make up the majority of the sales.  So for my second cupcake creation, I had to give thin mints a shot.  I crushed up the thin mints and created a delicious cookie crust, made a rich chocolate cupcake, filled it with mint chocolate ganache, and frosted it with mint chocolate frosting.  If you’re a mint lover – enjoy!  You’re in for a real treat.

Mint Chocolate Cupcakes
(Makes 12-15 cupcakes)

For the thin mint cookie crust:

1 cup (about 15 cookies) thin mints, crushed
1/3 cup unsalted butter, melted

For the chocolate cupcakes:

1 cup flour
1/4 cup cocoa powder
3/4 tsp baking powder
3/4 tsp baking soda
1/4 tsp salt
1 cup sugar
1 egg
1/2 cup milk
1/4 cup vegetable oil
1 tsp vanilla extract
1/2 cup boiling water

For the mint chocolate ganache:

1/2 cup heavy cream
1 cup (about 6 oz) milk chocolate chips
1/2 tsp peppermint extract

For the mint chocolate frosting:

2 cups confectioners sugar
4 tbsp unsalted butter, at room temperature
3 tbsp heavy cream
3 tbsp mint chocolate ganche (recipe follows)
1 tsp vanilla extract
1/4 tsp peppermint extract

Preheat oven to 350F.  Line your cupcake pan with liners.

Prepare the cookie crust; add the thin mints to a ziploc bag and seal.  Using your fist or the flat side of a meat tenderizer, crush the cookies until it is a coarse mixture.  Add to the melted butter and stir until incorporated.  Press about 1 tbsp into the bottom of each cupcake liner.  Bake for 3 minutes and remove from the oven.

Prepare the batter; combine the flour, cocoa powder, baking powder, baking soda, and salt in a large bowl.  In the bowl of a stand mixer, combine the sugar, eggs, milk, oil, and vanilla extract.  In a couple batches, add the dry ingredients to the wet ingredients and mix.  With the mixer at a low speed, add the boiling water.  Be patient – it will take about a minute for everything to incorporate.

Next, prepare the ganache; in a small saucepan on medium heat, bring the heavy cream to a simmer.  Pour the hot cream over a medium bowl containing the chocolate.  Whisk together for 2-3 minutes, or until the chocolate is completely melted and incorporated with the cream.  Add the peppermint extract and mix.

Fill each cupcake liner about 2/3 full and bake for 20 minutes, or until a toothpick in the center comes out clean.  Cool slightly and using a cupcake corer or teaspoon, remove a small amount of cake from the center of each cupcake. Fill each hole with ganache to the rim, about 2 tsp worth.

While the cupcakes are in the oven, prepare the frosting; beat the sugar and butter until they are incorporated.  Small clumps are okay.  Add the heavy cream, vanilla extract, and peppermint extract and beat for 2-3 more minutes, or until desired consistency is reached.  If too thin, add more confectioners sugar.  If too thick, add milk 1 tsp at a time.  Frost the cupcakes however you’d like!

– cupcake on,
Sharon

img_1217

valentine’s day: chocolate cupcakes for two

img_1161

The best (or worst?) thing about this recipe is that it only makes enough batter for exactly 2 cupcakes.  So if you’re sharing Valentine’s day with a special someone, you’ve each got a cupcake for dessert.  And if you’re single and just as special, you’ve got two cupcakes to eat for dessert.  Honestly, I think the single ladies and gents have the advantage here.  Because 2 cupcakes is ALWAYS better than 1.  Whether you’re single or taken on this made up holiday, take a break and indulge yourself with some sweets!

Chocolate Cupcakes for Two
(Makes 2 cupcakes)

For the cupcakes:

3 tbsp flour
2 tbsp sugar
1 1/2 tsp cocoa powder
1/8 tsp baking soda
1/16 tsp salt
2 tbsp water
1 tbsp vegetable oil
1/8 tsp vanilla extract
1 tbsp mini chocolate chips

For the frosting:

3 tbsp unsalted butter at room temperature
1 1/2 tbsp cocoa powder
4 tbsp confectioners sugar

Preheat oven to 350F and prepare 2 cups of a cupcake pan with liners.

In a small bowl, combine the flour, sugar, cocoa powder, baking soda, and salt.  Add the water, vegetable oil, and vanilla extract and combine with a hand mixer.  Add the batter to the two cupcake liners and top each cupcake with a 1/2 tbsp of mini chocolate chips.  Bake for 17-18 minutes or until a toothpick in the center comes out clean.

While the cupcakes are in the oven, prepare the frosting.  In a small bowl, combine the softened butter and cocoa powder with a hand mixer.  Add the confectioners sugar 1 tbsp at a time until your desired consistency is achieved.  Once the cupcakes have cooled, frost and decorate however you’d like!

cupcake on,
Sharon

img_1165

chocolate chip waffles

img_1153

I’m embarrassed to say this, but the first purchase I made when I moved out of my mom’s house and into my own apartment was a waffle iron.  About 5 years have passed since that day, and I still love pulling out my waffle iron every weekend and making waffles.  Over the years, I’ve developed my go-to recipe.  It is a simple recipe that calls for one bowl (easy clean up), simple ingredients that you’ll without a doubt always have in your kitchen, and only a few minutes of work.  And it leads to super fluffy waffles that are soft on the inside and crispy on the outside.

I usually make these with chocolate chips, because… well… chocolate.  But this recipe can easily be made without the chocolate if all you want are some plain jane waffles.  Nothing wrong with that!

Chocolate Chip Waffles
(Makes about 4 8-inch round waffles)

2 tablespoons melted unsalted butter
1 1/2 cups milk
2 eggs
1 1/2 cups flour
1/2 tbsp baking powder
1/4 cup chocolate chips

Preheat your waffle iron.  I set my Oster waffle iron to the max setting.

In a large bowl, whisk together the milk and eggs.  Slowly whisk in the flour, baking powder, and melted butter.  Whisk until just combined – small lumps are okay!  Stir in the chocolate chips.

Add about 2/3 cup into the center of the waffle iron – make sure you are grabbing chocolate chips, too!  They tend to sink to the bottom of the bowl.  The batter will spread throughout the waffle iron, but you can use a small spoon to quickly make sure that the batter is spread evenly throughout the iron.  Close the lid and cook for about 5 to 5 1/2 minutes, or until the waffle is golden brown.  Remove with a fork and repeat until all the batter has been used.

Serve immediately with chocolate sauce, maple syrup, or whipped cream!

– breakfast on,
Sharon

img_1152

homemade rice krispies treats

img_0985

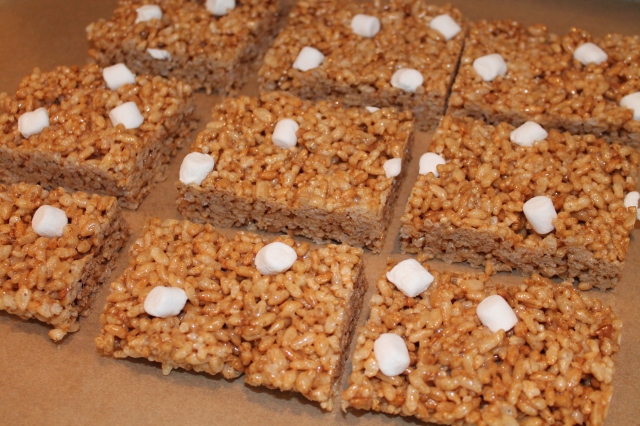
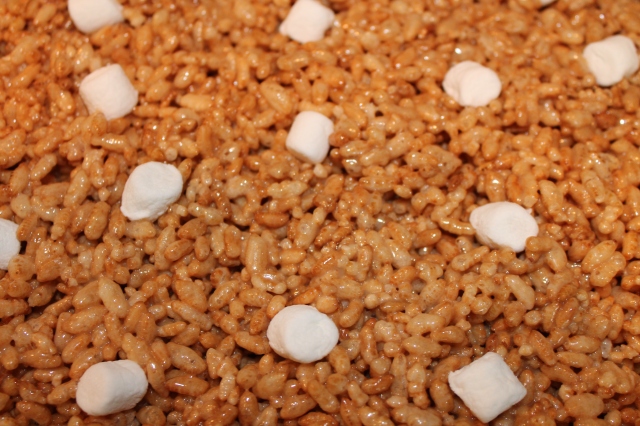
K and I are big snackers.  Always have been, and always will be.  If I had my way, I’d snack on chocolate all day, but for some strange reason, I’ve been told “that’s not healthy, Sharon.”  Whatever.  So when I get a craving during the day and I’m just not feeling the healthier option of fruit, vegetables, or some hummus, I go for these homemade rice krispies treats.  They’re fun, sweet, and the perfect little mid-day snack.

Oh!  And did I mention these are so easy to make?!  Just 3 ingredients (rice krispies cereal, butter, and marshmallows) and no baking necessary!  I personally always have rice krispies cereal in the house, and butter, well yeah, there’s always butter here.  So that just leaves marshmallows, which as you’ve seen by my other post, is now a staple in this household!

img_0984

Rice Krispies Treats
(Makes one 9×13″ pan, or about 12 “treats”)

3 tbsp butter
6 cups rice krispies cereal
4 cups mini marshmallows

Coat a 9×13″ pan with butter or cooking spray.  Set aside.

In a medium saucepan over low heat, melt the butter.  Once the butter has melted, add the marshmallows and allow to fully melt.  Remove from the heat and add the cereal.  Stir well and pour into the prepared pan.  Spread the mixture evenly across the entire pan, and allow to let cool for a couple hours.  Cut into small squares and serve immediately.

– snack on,
Sharon

img_0992

chocolate pecan pie

img_0761

For most of my life, I’ve chosen cake over pie.  Who could say no to chocolate, frosting, and moist cake?  How could I ever pick fruit and a dry crust over that?!  Boy was I misinformed.  This chocolate pecan pie changed everything.  Not only does it have chocolate, my most favorite ingredient on the planet, it also has the most flaky crust ever. Served warm with some ice cream, and I could eat this for breakfast, lunch, and dinner.

Of course, you can use store-bought crust, but do not be frightened to try making this crust from scratch!  It really does make such a huge difference, and it is very straightforward!  A perfect pie to make on a cold wintry weekend day.

Chocolate Pecan Pie
(Makes 1 pie with extra dough for a crust)

For the crust:

1 3/4 cups bread flour
1/2 tsp salt
1 cup unsalted butter, cold and cut into 1cm cubes
3 tbsp ice water

In a large bowl, combine the bread flour and salt.  Add the butter and mix with your hands until everything is combined and the butter has broken down into small pieces.  Add the ice water and continue to knead the dough.  The dough should come together at this point.  If too thick, add a tad more water.  If too thin, add a tad more flour.  Small chunks and streaks of butter is good!  Divide the dough into two discs, cover with plastic wrap, and refrigerate for a couple of hours.

For the pie:

1/3 cup brown sugar
1/3 cup corn syrup
3 eggs
1 tsp vanilla extract
1/4 cup unsalted butter, melted
1/4 tsp salt
2 cups pecans, chopped
1/4 cup milk chocolate chips
1/4 cup dark chocolate, cut into small cubes
Egg wash

Preheat oven to 375F.

Take one of the discs of dough and roll it out to a thickness of about 1/4-1/2 cm.  Lay the dough in a pie dish and cut any excess dough that is hanging off the edges.  Place in the refrigerator.

In a large bowl, or in the bowl of a stand mixer, mix the brown sugar and corn syrup.  Mix in the eggs one at a time.  Add the vanilla extract, butter, and salt, and mix until uniform.  Mix in the pecans and chocolate, and pour the filling into the pie dish.

Remove the second disc of dough from the refrigerator.  Roll it out to a thickness of about 1/4-1/2 cm.  Cover however you wish – lattice, a small cookie-cutter design, or a full crust cover.  Brush the crust and edges with egg wash.

Bake for 40-45 minutes.  Let cool before cutting and serving.

– bake on,
Sharon

img_0766