creamy spinach

IMG_0737
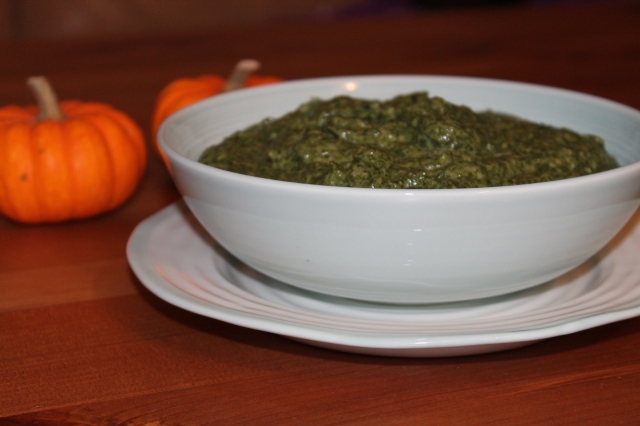
For the longest time, I didn’t have an immersion blender in my new apartment.  And when you have such a love for creamy spinach like I do, that’s a real issue.  So as soon as my birthday rolled around, and the “what do you want for your birthday?” talks began, it was only logical for this young lady to request a purple immersion blender.

What’s the big deal about some creamy spinach, you ask?!

Well, this creamy spinach is only the most delicious side dish you could ever have.  Shirley and I grew up with our mom making this dish for us.  I always loved that it felt like a meal in itself.  It wasn’t just a piece of broccoli or asparagus that I got sick of after two pieces.  Heck, I even remember standing over the stovetop with a spoon sneaking bite after bite while my mom yelled at me to move!

This is an easy dish that you will not regret!  Enjoy!

Creamy Spinach
(Makes 6 servings)

2 tbsp flour
2 tbsp salted butter
1/2 cup vegetable stock
1/2 cup 2% milk (may be substituted with another 1/2 cup of vegetable stock)
1/2 tsp salt
10 oz frozen chopped spinach (or about 24 oz fresh spinach)
1 medium onion, chopped
1/2 cup grated cheese (Gruyere, Fontina, or Cheddar)
1/8 tsp grated nutmeg
Salt and pepper to taste

In a small pan, melt the butter and stir in the flour until blended in.  Continue to stir on low heat until the mixture is light yellow.  Add the stock, 1/2 tsp salt, and milk in a few batches, stirring after each addition, until a uniform texture is reached.  Keep adding liquid to form a smooth and thick paste.  Remove from heat.

In a large pan, sauté the chopped onion in olive oil until translucent.  Add the spinach and reduce heat.  Let cook for 15 minutes, stirring occasionally.

Add the sauce to the spinach and stir well.  With an immersion blender, process the mixture until smooth.  Add the grated cheese and stir well.  Lastly, add the salt, pepper, and grated nutmeg to taste.

– food on,
Sharon

IMG_0734

back to basics: hummus

IMG_0200
With the Jewish New Year having just passed, I’ve been thinking a lot about home.  Growing up along the Mediterranean Sea, hummus and pita was almost always a part of every meal.  Authentic hummus and freshly out of the oven pita is one of the simplest, yet most delicious meals you could ever have.  So since moving to the US, our standards for both have been very high.  Over time, we’ve found that there’s really nothing better than homemade.  There’s just no comparison.

Today we’ll start with the hummus.  Because the truth is, when hummus is this good, you could literally eat it with a spoon.  No cracker, chip, pita, carrot, or bread required (although all will be just fine along with it).  The prep time may seem daunting, but I assure you, the patience will be so worth it once you take that first taste.

Hummus
(Makes 8 cups)

2 cups dry chick peas
1 teaspoon baking soda
5 garlic cloves, coarsely chopped
1/2 cup raw tahini
Juice from 1 lemon
Salt and pepper to taste

Soak the chick peas in water for 8 hours (or overnight) in a large pot.  Drain.  Add water once again to cover, plus 1 inch, as well as the baking soda.  Mix well.  Cook the chick pea and water mixture on low heat.  Skim off any foam with a spoon.  Continue to cook over low heat for 60 minutes.  Remove from heat and let cool.  Drain the water, being sure to reserve the liquid.

In a food processor, combine the drained chick peas with the garlic, and process to a uniform mixture.  Add the tahini and lemon juice and continue to process.  The mixture will become thicker over time.  If you feel that the mixture becomes too thick, add some of the reserved liquid.  Add salt and pepper to taste.

Garnish with fresh parsley, olive oil, za’atar, and/or pine nuts.  Serve chilled with pita bread, vegetables, pita chips, or crackers!

food on,
Sharon

IMG_0198

roasted garlic cauliflower

IMG_0553
I think the wintry temperatures have officially hit south jersey.  The nights have been filled with hot showers, cuddling, blankets, reading, hot tea, and lana del rey playing throughout the house.  The short days don’t do much to help my motivation.  As a result, we’ve been relying on quick, simple, and filling dishes to get us through these first few weeks.  When 50 degrees feels like the coldest thing ever.  I know that sounds ridiculous.  Sharon from 3 months from now is currently laughing out loud at present Sharon.

I made this side dish last week on one of those cold nights.  It’s a easy and healthy dish.  Cauliflower has very high amounts of both vitamin c and vitamin k, and garlic is rich in antioxidants, so your taste buds AND body will be happy.  Win-Win.

So cuddle up with your loved ones on these chilly nights, and eat these cauliflower nuggets like you’re an extra on those hidden valley commercials.

IMG_0391
Roasted Garlic Cauliflower
(Serves 3-4)

1 head cauliflower, washed and cut into small florets
1/3 cup olive oil
4 heads of garlic, minced
Salt and pepper to taste

Preheat oven to 425 F.

In a large bowl, toss the cauliflower florets, oil, garlic, salt, and pepper.  Ensure that all the florets are evenly coated.

On a sheet pan, spread the florets evenly through the pan.  Bake for 15 minutes, flip the florets, and bake for 15 minutes more.  Serve warm.

– food on,
Sharon

IMG_0557

guacamole with baked tortilla chips

IMG_0114
The fantasy football line up is complete.  The jerseys are out of the closet and ready to be worn.  And the food preparations are complete.  The moment I have been waiting for is here…

FOOTBALL SUNDAY is BACK!

I couldn’t be happier to be back in football season.  There is nothing better than wearing your jersey, eating a bowl of chili, cheering on your favorite team, and screaming at your computer when your benched quarterback gets 30 more points than your starting quarterback in fantasy.

Football has always been a favorite in our household.  I still remember my first memory of football – watching John Elway and the Denver Broncos win Superbowl XXXIII.  We’ve never looked back since.  Football Sundays will always been a great time, full of chips and salsa, pizza, and the occasional screaming and jumping on the couch.

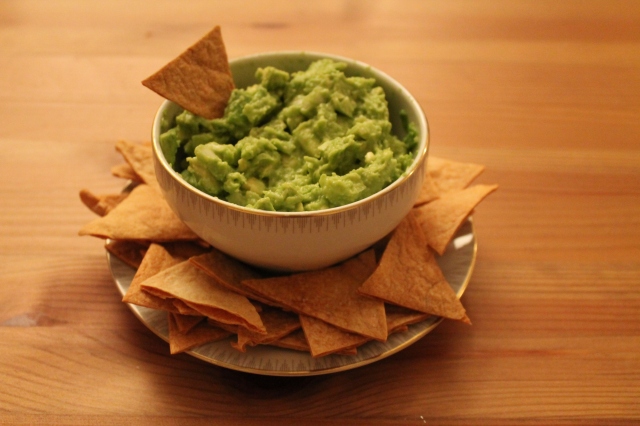
This Sunday, I figured I’d kick it off with something homemade and delicious like this guacamole and tortilla chips – something that literally takes 5 minutes to make, and can be gone in 30 seconds.  Well worth your time considering how much cheaper, healthier, and tastier homemade over store-bought can be.

IMG_0110
Guacamole
(Serves 6)

3 ripe Hass avocados, chilled
1 small Vidalia onion, peeled and diced into small pieces
2 cloves garlic, crushed
½ teaspoon garlic powder
Salt and pepper, to taste

Halve each of the avocados, and remove and discard their pits.  Scoop the avocado flesh into a mixing bowl.  Using a fork, mash the avocados to the point where it is a creamy mixture, but with some pieces of avocado in it.  Stir in the onion, garlic, garlic powder, salt, and pepper.  Taste the guacamole, and adjust the spices, if desired.  Serve immediately with baked tortilla chips, celery, or carrots.

Baked Tortilla Chips
(Serves 6)

1 small package of white corn tortillas, burrito size
Vegetable oil
Salt

Preheat oven to 400 F.

Cut the tortillas into triangles, at a size that you prefer.  I prefer about 3-inch triangles.  Lay the tortilla triangles side by side on a large baking sheet, making sure that none are overlapping.  Working with a little bit of vegetable oil at a time, brush each of the triangles with oil.  Flip the triangles, and brush this side with oil as well.  Sprinkle with salt.

Bake in the oven for about 3 minutes.  Turn the chips over and bake for another 3 minutes, being careful, as the chips bake very quickly.

Let the chips cool before transferring to a bowl and serving with guacamole or salsa!

– football on,
Sharon

IMG_0112

eggplant parmigiana

IMG_0379
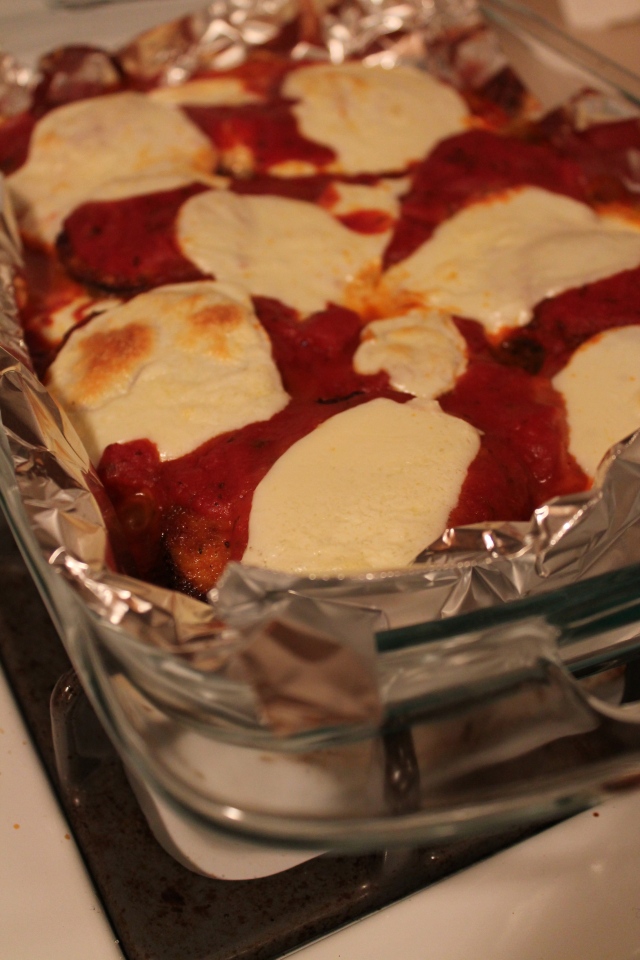
Do you have a meal that no matter how long it takes to make, you still don’t care and find yourself making it every single week?  Our eggplant parmigiana is that type of meal.  It is definitely no quick meal (about an hour of preparation/cooking involved), yet we still find ourselves making it every week.  We love it for a variety of reasons.  First, it’s a completely vegetarian meal.  We are big meat eaters, but a couple dinners a week, we put that all away and have a vegetarian meal.  We’ll usually have pasta one of the days, and then this the other day.  But to be honest, you don’t even realize that there’s no meat.  Eggplant is one of those vegetables that is still very filling and full of flavor.  Secondly, it is such a flavorful meal.  The homemade (or store-bought!) tomato sauce, the fresh melted mozzarella, and the italian-style seasoning on the tender eggplant slices meshes so well together.  It is a home-y meal that despite taking the time, is totally worth it.

Eggplant Parmigiana
(Serves 3-4)

1 large eggplant, sliced to 1/4-1/2″ slices
2 eggs, whisked on a flat dish
Italian seasoning bread crumbs, on a flat dish (about 2 cups should be enough)
2-3 cups of homemade tomato sauce, or about 1 24-oz jar of tomato sauce
1 fresh mozzarella ball, sliced to 1/4″ slices
Plenty of olive oil for frying

Preheat oven to 350 F.  Fill a large pan with enough olive oil to well-coat it.  Heat to medium-medium high.

On the counter, organize your stations – sliced eggplants, eggs, and bread crumbs.  Dip the eggplant slices into the eggs, then directly into the bread crumbs.  Make sure both the top, bottom, and sides are coated.

Once the oil is hot enough, add as many eggplant slices as you can to the pan without having any overlap.  Let the slices cook for about 3-5 minutes on each side.  Even though they’re going to keep cooking in the oven, the eggplant should be almost 100% cooked and tender.  If you push a spatula onto the middle of the eggplant, you shouldn’t really feel any resistance.  Repeat this process, adding more oil as needed, until all the slices are cooked.

On a 7×11″ pyrex casserole dish, start laying the cooked slices.  Once you have the first layer, coat them with a layer of tomato sauce.  Add another layer and coat with another layer of tomato sauce.  That should be it for the eggplant and tomato sauce, but continue if you still have either remaining.  Add the cubes of cheese on top.  Transfer the dish to the oven and let cook until the mozzarella starts to brown and the sauce is bubbling, about 45 minutes.  Let cool for a few minutes.  At this point, the eggplant should be completely tender.  No knife necessary!

– food on,
Sharon

IMG_0378

broccoli, potato, and mozzarella scrambled eggs

IMG_0070
K and I went to a Phillies game yesterday (my second of the week – and ever – and his first of the week – and ever).  As I expected, we had a great time.  It was actually the Hall of Fame day, where people like Curt Schilling were inducted into the HoF.  And the game was really exciting!  We got back late and headed straight to bed.  We both woke up this morning tired as ever, but K had to run to work, and I had to wake myself up and kill a couple hours before Zumba class.  And what’s a better way to burn a couple hours than to spend it in the kitchen!?

I was on a mission.  With a good workout in my horizon, I knew I needed something that was filling and full of protein.  Plus, that broccoli sitting in my refrigerator needed to get used up.  Time to improvise.  That’s the great thing about these scrambled eggs.  Use whatever you have sitting in your fridge!  Asparagus, broccoli, onions, you name it!  I promise you, anything that you mix with eggs and mozzarella WILL taste GOOD.

Broccoli, Potato, and Mozzarella Scrambled Eggs
(Makes 1 serving)

3-4 tablespoons extra virgin olive oil
2 eggs, scrambled
5 broccoli florets, washed and cut in half, lengthwise (remove any super long stems)
1 small potato, peeled, washed, and cubed
1/4 cup shredded mozzarella cheese
1/2 teaspoon salt
1/2 teaspoon pepper

In a medium-sized nonstick frying pan, heat a few tablespoons of extra virgin olive oil at medium heat.  Check if the oil is warm enough by adding a single potato cube and checking to see if it sizzles right away.

Once at the correct temperature, add the remaining potato cubes to the oil.  Let the cubes cook for 5 minutes, flipping regularly to ensure that all sides cook evenly.  Then, add the sliced broccoli florets.  Let the potatoes and broccoli cook for another 5 minutes, once again flipping regularly.  The potatoes should appear crispy and browned, but soft on the inside.  The broccoli should develop a bright green color, but some browning from the oil is okay.

Once the vegetables are tender and ready, lower the heat to medium-low and add the scrambled eggs.  Season with salt and pepper.  For the first 2 minutes, don’t touch the mixture!  After 2 minutes have past, stir the entire mixture together.  It should be a mix of some cooked eggs, and some runny egg.  Add the mozzarella cheese.  Continue letting the egg cook completely, about another 1-2 minutes, or until the egg white is no longer translucent.  Remove from the heat, and serve immediately with a glass of cold milk!

– food on,
Sharon

IMG_0072

potato latkes

Image

Here we are embarking on a new adventure… foodyventures.  It’s only fitting that we start this guy off with a recipe we’ve grown up loving.  As we both grew up and moved into our own new mini-kitchens apartments, we figured this would be a fail proof recipe to impress our other halves with.

Latkes are like chocolate chips.  You can’t just have one.  In fact, you put two on your plate, and say, “Yeah, that’s more than enough,” and before you know it, you’ve eaten six.  But who could resist?  These latkes are crispy on the outside, and so fluffy on the inside.  Serve them warm with a dollop of sour cream, applesauce, or with just a little bit of salt.  We promise.  You can’t just have one.

Potato Latkes
(Serves 6-8)

1 pound potatoes
½ cup finely chopped onion
1 large egg, lightly beaten
½ teaspoon salt
½ teaspoon baking soda
½-3/4 cup olive oil

Peel the potatoes and coarsely grate them by hand, transferring to a large bowl of cold water as grated.  Soak the potatoes for 1 to 2 minutes after the last batch is added to the water.  Drain well.

Spread the grated potatoes onto a kitchen towel.  Twist the towel tightly to wring out as much liquid as possible.  Transfer the potatoes to a bowl and stir in the onion, egg, salt, and baking soda.

Heat ¼ cup of olive oil in a large nonstick skillet over moderately high heat until hot.  Working in batches of 4-5 latkes, spoon 2 tablespoons of potato mixture per latke into the skillet, spreading into 3-inch circles with a fork.  Reduce heat to medium heat and cook until the undersides are browned, about 5 minutes.  Turn the latkes over and cook until the undersides are browned, about 5 minutes more.  Transfer the latkes to a paper towel to drain, and season with salt.  Add more oil to the skillet as needed.

Serve warm with sour cream, applesauce, or another favorite sauce.

PS.  The possibilities are endless. Substitute the potatoes for broccoli.  Cauliflower.  Sweet potatoes.  Mmmmm.

– food on,
Sharon & Shirley

IMG_0137

Q for U: What’s the recipe you grew up loving?